In order to create a new Custom Form, you will need to complete the following basic steps:
- Create a Template for the Form
- Add Section Types to the Form
- Add Fields to the Form
- Preview the Custom Form
- Deploy the Custom Form

Complete the following steps to create Custom Forms.
Note: You can select the headings below for more detailed information on each step in the process.
Step 1: Create the Template
1. From the Configuration page, select Custom Forms.
2. Select New to create a new form.
3. Enter a Name in the Template Name field.
Note: When defining new templates, it is highly recommended that you include a version number in the template name to help identify the template and to reduce the chance of unintentionally changing an older version of the form. For example, you could use (templatename1.0, templatename1.1, templatename1.2) etc,.
4. Save the form.
5. The new form can now be created by adding sections and fields to the template.
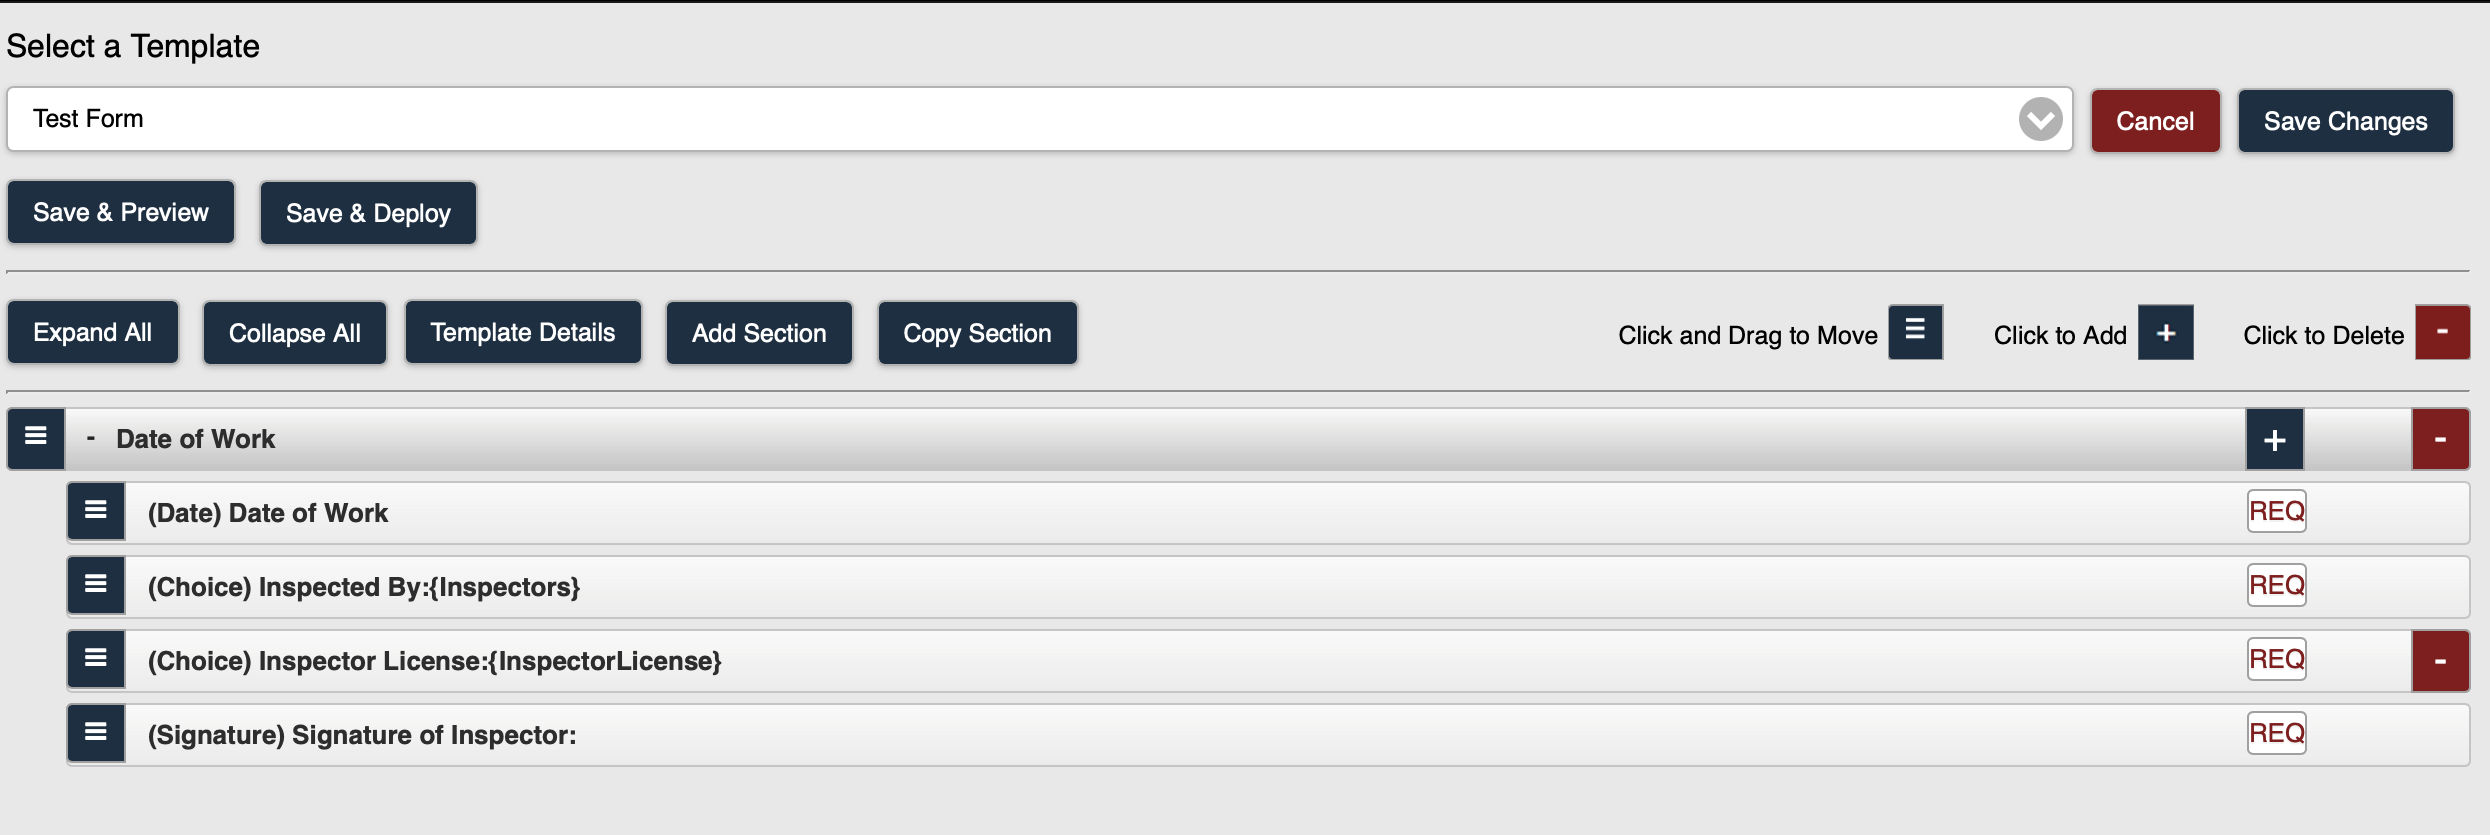 Define/Edit Template Page
Step 2: Add Section Types
1. From the Define Templates page, select Edit.
2. You can also add the following components to your Custom Form:
- Assets Supplement
- Fire Extinguisher Supplement
- Security Alarm Device
- Alarm Supplement
- Device Supplements
- Control Valves Supplement
- Visibility Filter
- Code References
Step 3: Add Fields to Sections
1. From the Define Templates Edit page, you can add the following fields to the sections mentioned in Step 2:
- Add Fields to a Standard Section
- Add Fields to a Fixed Table Section
- Add Fields to an Expanding Table
- Add a Supplement Section
- Add Fields to a Pump Curve
2. You can also add the associated fields for the following section types:
- Add an Assets Supplement
- Add a Fire Extinguisher Supplement
- Add a Security Alarm Device
- Add an Alarm Supplement
- Add a Device Supplement
- Add a Control Valves Supplement
- Add a Visibility Filter
- Add Code References
Step 4: Preview the Custom Form
You can preview the template that you are creating/editing in order to view the template it as it will appear as a form to users in Formlink.
1. From the Configuration page, select Custom Forms.
2. Select a Template.
3. Select Preview.
4. The Preview page displays the template as it will appear as a form in your system.

Preview Custom Form
Step 5: Deploy the Custom Form
Once a new form has been created using the template, you can Deploy the Custom Form to your system for use in the field.
Note: If you do not see the Deploy option/button on your screen, please contact FormLink to enable the functionality for your account.
1. Select Deploy or Save & Deploy (dependent upon if changes to the template have been saved) on the Define Templates page.
Note: You must resolve all Error Messages before you can deploy a form.
2. Select an Assembly Type from the drop-down selection list.
Note: You can also select the Add a New Assembly Type option from the drop-down selection list to add a new Assembly Type.
3. If the selected Assembly Type is included in an Account, the Default Frequencies for the Assembly will be available using the Load Default Frequencies button.
Note: If there are no Default Frequencies established for an Account, the Default Frequencies button for that Account will not be enabled and the label will read No Default Frequencies.
4. Select the Load Default Frequencies button for the selected Assembly.
5. The Default Frequencies for the selected Assembly are displayed.
6. Select the Account(s) in which to deploy the form.
Note: You can also use the Select All checkbox to deploy the form to all Accounts.
Note: The Filter option allows you to filter Accounts by name.
7. Select the Deploy button.
8. The form is deployed to the selected Account(s).
Note: If you select more than one Account when you deploy the form, any Default Frequencies will be transferred to all selected Accounts.